Mapping your items is one of the first steps you have to complete when integrating your POS system. After you've connected your POS system to Backbar from the Dashboard, navigate to the Map Items page on the side navigation bar, under Sales.
On the Map Items page is a list of POS items that will be updated every time a new product is added to your POS system. (refresh for new item addition visibility)

There are three tabs - Needs Review, Mapped, and Skipped.
Needs Review: Items in this tab are not mapped yet, but have been automatically matched to items in your Backbar inventory with Backbar's best guess to the corresponding product. The sales data will not be tracked in Backbar until you match/approve the match. All alignments still need to be reviewed in order to confirm the correct item, package, and serving size.
Mapped: These are items that you have reviewed and saved. They will be tracked through Backbar and included in your Sales data and reports. Only items that are saved and on the Mapped tab will gather sales data and adjust on-hand quantities of items on your Backbar inventory.
Skipped: Items you have already reviewed and don't want to be mapped in Backbar. Items that are part of POS groups that you chose not to include during the 'Set standard serving sizes' step of the POS setup process will be placed in the Skipped tab. If you come across an item that is not going to be tracked, simply click the Skip mapping button to move it to this holding page. Items must be "unskipped" before they can be mapped in the future.
In the Needs Review tab:
POS Group/Name are the item/group names in your POS that need alignment to the correct item in Backbar.
Item in Inventory is the current 'best guess' for an item that is the correct match. If this column is blank we couldn't formulate a best guess.
Match Confidence column is a visual indicator of how accurate the system thinks this match is.
Review each one and ensure the matches are correct between your POS system and the Backbar inventory items. An item with no match or size information cannot be moved into the 'Mapped' tab.
It is important that you review all the matches Backbar has made to ensure that your sales data will display correctly on your Sales Dashboard and reports. If the item in your POS matches the correct item/package in Backbar then review the serving size is correct and click Save Mapping. This will move the item from the Needs Review tab to the Mapped tab and is then receiving sales info.
Some items in your inventory might be missing size information. These items will be indicated with a yellow alert icon. Items will not be moved into the Mapped tab until you have entered their size information (amount, units, container) from clicking the notepad icon the right sidebar.

Some POS items and recipes might be incorrectly matched, or don't have a match at all. If so:
1. Select the item, then click Find Match in the sidebar
2. Search for the item in your inventory
3. Select the correct item or recipe
4. Click Save to move the item into the Mapped tab.
If you can't find an item in your inventory
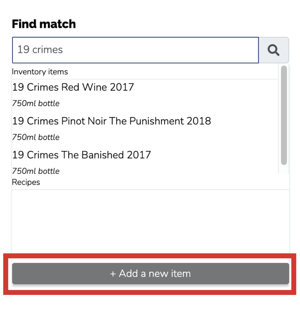
If you can't find the item you want in your inventory, you will have to add it as a new item to your inventory, from the Find match screen:
1. Click the gray Add new item button at the bottom of the dropdown
2. Search for the item in our database
3. Select the correct item
4. Click Save to move the item into the Mapped tab.
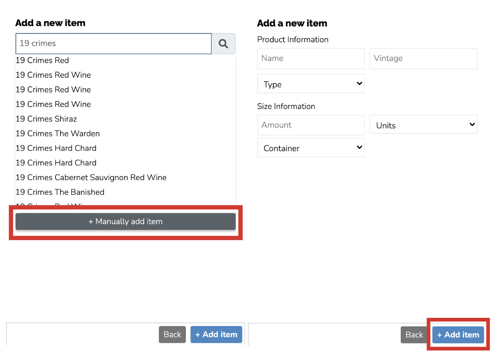
However, if you still can't find the item in our database, you will have to manually add it. From the 'Add a new item' screen,
1. Click the green Add a new item button
2. Complete its product and size information
3. Click Manually Add item
4. Click Add Item to move the item into the Mapped tab.
If you can't find a recipe match in your inventory
If a POS recipe wasn't matched to a recipe in your inventory by Backbar and you cannot find the correct one with the 'Find Match' action, you will have to create a new recipe by clicking Create Recipe.

On the 'Recipe information' page, enter the recipe name and type, then add ingredients using the search box. Enter the quantities used for each ingredient. Again, if you cannot find a product, add it as a new item by clicking + Add a new item. Click Save when you are done.
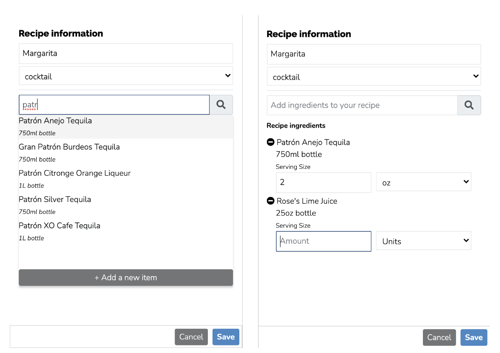
You can then click the Save button to move it into the Mapped tab.

