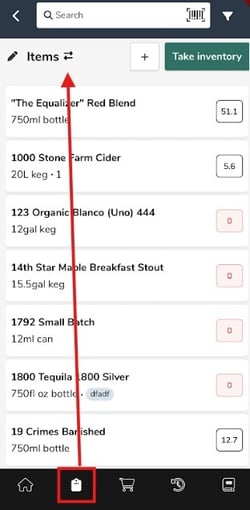
1. In the left navigation panel, go to Inventory and select Recipes.
2. Click the Add new recipe button in the top right.
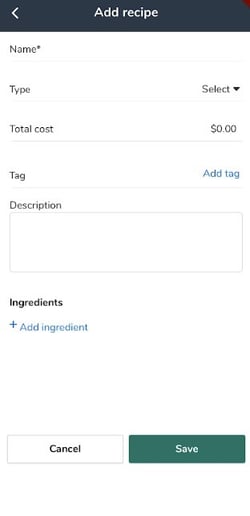
3. Begin building your recipe. Recipes serve as a set of instructions for your staff as reference during service or for your POS integration to process the correct item depletions during a registered sale with accounts synced with their POS system.
-You will begin by typing in the Name of the recipe and the selecting either Food or Cocktail from the Type dropdown.
-You can also add a Custom Tag if you are on the Pro plan.
-The Description/Short Description fields are utilized for any notes you wish to add to the recipe. The full Description field will show in the Shift Notes for staff on the mobile app for easy reference.
-Images or connected URL images can be uploaded directly or linked via URL in the "fetch" field.

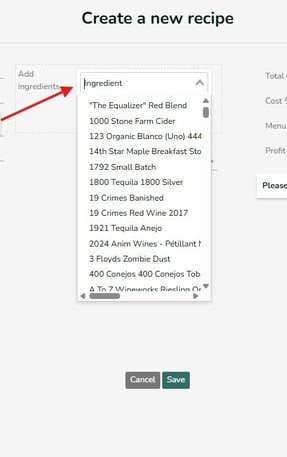
4. Next enter in the ingredients for the recipe in any order. You will click the Ingredient dropdown selector to chose items from your Inventory Items list to add to the recipe. Items must be added to the Inventory Items list before they can be added to a recipe. Pro Tip: open a second Backbar window and add items in that second window if necessary, so you do not need to keep saving/exiting out of the recipe screen. Then simply reload the recipe page to access these new item additions, creating fewer screen changes.
After selecting the item, set the recipe ingredient serving and chose the correct unit. Cocktail ingredients contain volume units, and food recipes contain weight-based units.
5. If you are on a subscription plan, you will also see the price calculator available to assist in setting prices and pour costs for you drinks on your menu. If you enter the Menu Price field it will list this price on your Backbar QR linked menu if using.
6. When you’re happy with your recipe, make sure to click Save to retain the relevant changes before navigating off the recipe page.